In the last couple of days I have been playing with Cloud9 and it looks awesome. This tutorial will explain how to install Cloud9 IDE locally on your Ubuntu, how to create a script to easily switch between your projects and how to launch it using a customized separate browser profile.
What is Cloud9?
Cloud9 is an open-source full browser-based IDE with team collaboration and online project hosting, through GitHub integration.
For more information about it's functionality and innovative approach, see Why Cloud9 Deserves your Attention.
If you just want to use Cloud9 in the cloud, create a free account at http://cloud9ide.com and jump to section 4 of this tutorial.
1. Installation
The installation instructions are based on the tutorial posted on the Gratuitous Development blog and have been tested on Ubuntu 11.04.
1.1 Installing Dependencies
First you need to install the necessary dependencies to build node.js and o3.
Open a terminal, paste the following code and hit Enter:
Code:
sudo apt-get install -y build-essential g++ curl libssl-dev apache2-utils git libxml2-dev
1.2 Installation directory
In order to avoid permissions issues, it is recommended to create a folder under your home for installing the necessary applications. Furthermore, you need to install everything on the same directory, so I recommend a separate folder just for these applications. In my system, I install several applications manually in the ~/install folder, so I have created another sub-folder for Cloud 9 stuff. For this tutorial I will use the same folder as the original tutorial, which will be ~/local. However, you can use whatever name and directory structure you want, just make sure to use the correct paths in the commands throughout the tutorial.
So, create the installation folder and add the bin sub-folder to bash:
Code:
mkdir ~/local

echo 'export PATH=$HOME/local/bin:$PATH' >> ~/.bashrc
. ~/.bashrc
Then cd into the installation directory. All the following instructions are assuming you started your terminal within the installation folder. They will instruct when you need to change directories.
1.3 Installing node.js
The following commands will fetch the node.js source code from GitHub, cd into it's directory, switch to the latest stable branch, configure it to be installed in the ~/local folder, build, install and test it.
Code:
git clone git://github.com/joyent/node.git
cd node
git checkout v0.4.10
./configure --prefix=~/local
make
make install
make test
cd ..
node -v
1.4 Installing npm (Node Package Manager)
Code:
curl http://npmjs.org/install.sh | sh
npm -v
1.5 Installing Cloud9
The following commands will fetch Cloud9 source code from GitHub, cd into it's directory, switch to the latest development branch and update the submodules.
Code:
git clone git://github.com/ajaxorg/cloud9.git
cd cloud9
git checkout devel
git submodule update --init --recursive
bin/cloud9.sh
cd ..
1.6 Installing o3
The following commands will fetch o3 source code from GitHub, cd into it's directory, build it and copy it to cloud9 installation folder.
Code:
git clone http://github.com/ajaxorg/o3
cd o3
./tools/node_modules_build
cp build/default/o3.node ../cloud9/support/jsdav/support/node-o3-xml-v4/lib/o3-xml/
cd ..
That's it for the installation part.
1.7 Removal
In case you decide Cloud9 is not for you or if it doesn't work as expected, you can remove it completely by deleting the installation directory, which is ~/local in this tutorial.
Then open ~/.bashrc:
Remove the following line:
Code:
export PATH=$HOME/local/bin:$PATH
To remove the dependencies:
Code:
sudo apt-get remove build-essential g++ curl libssl-dev apache2-utils git libxml2-dev
2. Launching your project with Cloud9
Cloud9 can be used with any web browser. All you need is to start the server with your project path:
Code:
~/local/node ~/local/cloud9/bin/cloud9.js -w ~/pathtoyourproject
Then you can open it in your browser by typing the following url in the address bar:
Code:
http://127.0.0.1:3000
To stop the server:
3. Easily switching projects
Unlike more traditional integrated development environments like Netbeans, Eclipse or Aptana, which allows to open several projects simultaneously, it seems Cloud9 is designed to work with a single project. I have several git projects under the same root directory and I tried to open the root instead of the project itself, but it doesn't seem to work as expected. You can actually do it, but then you lose git integration.
The single project approach makes sense for cloud hosting, but it is a little bit inconvenient when you are working with a local installation. However, it is easy to switch projects with a simply shell script.
First make sure you have zenity installed:
Code:
sudo apt-get install zenity
Then create/open the script with your favourite text editor:
Code:
gedit ~/local/projectswitcher.sh
Add the following code and save it
Code:
#!/bin/bash

PROJECT=$(zenity --file-selection --directory --title 'Select a Project Directory')

if test -d "${PROJECT}";then
  killall node
  $HOME/local/bin/node $HOME/local/cloud9/bin/cloud9.js -w ${PROJECT} &
fi
exit
Then make it executable:
Code:
chmod +x ~/local/projectswitcher.sh
To switch projects, launch the script by double-clicking ~/local/projectswitcher.sh and select the project folder with the folder picker when prompted. Assuming Cloud9 is already opened in your browser (see previous section), just reload the page to switch to the new project.
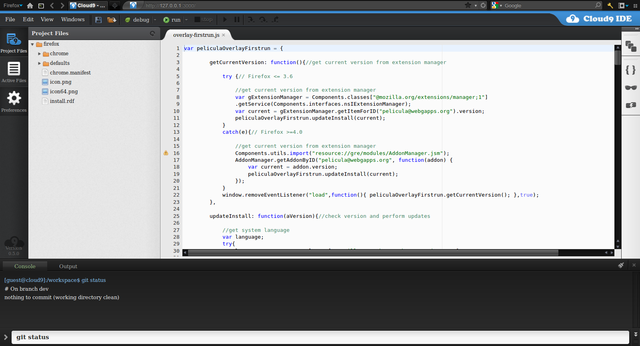
You can add the scrip to your desktop or panel for convenience. If you are using Firefox, you can also use my FoxRunner extension, that allows to run scripts from Firefox. This can be particularly useful for switching projects or if you use other scripts to manage your projects repositories. You can import the scripts above into FoxRunner or even create them using FoxRunner interface. For more information, see the extension documentation.
Here is a screenshot of FoxRunner sidebar along with Cloud9:

4. Create a separate browser profile
Although you can open Cloud9 within your browser session, you might find more convenient to work with it as a standalone application. You can do that by simply using a different browser, but using a different profile allows you to use the same browser you like for regular browsing. A different profile will allow you to use a different set of add-ons, that are related to development, without cluttering your browser with more icons. It also allows to customize the browser appearance, independently from your default profile.
4.1 Configuring a cloud9 browser profile in Firefox
To create a new profile in Firefox, execute the following command:
Code:
firefox -no-remote -CreateProfile "cloud9"
If you want to start your profile from command-line use:
Code:
firefox -P -no-remote "cloud9" http://127.0.0.1:3000
You can also create a script to launch the profile:
Code:
gedit ~/local/firefox-profilelauncher.sh
Add the following code and save it:
Code:
#!/bin/bash

firefox -P -no-remote "cloud9" http://127.0.0.1:3000 &
exit
Make it executable:
Code:
chmod +x ~/local/firefox-profilelauncher.sh
To delete the profile, in case you are uninstalling everything, open the profile manager and delete the profile:
Code:
firefox -no-remote -P
4.2 Configuring a cloud9 browser profile in Chrome
To create/start a cloud9 profile in Chrome use:
Code:
google-chrome --user-data-dir=$HOME/.config/google-chrome/cloud9 http://127.0.0.1:3000
You can also create a script to launch the profile:
Code:
gedit ~/local/chrome-profilelauncher.sh
Add the following code and save it:
Code:
#!/bin/bash

google-chrome --user-data-dir=$HOME/.config/google-chrome/cloud9 http://127.0.0.1:3000 &
exit
Make it executable:
Code:
chmod +x ~/local/chrome-profilelauncher.sh
To delete the profile, in case you are uninstalling everything, simply remove the profile folder:
WARNING: Be careful when using rm command with -r option. Make sure you type the path correctly, otherwise it might delete other stuff without prompting. To be safe, use the file manager instead.
Code:
rm -r ~/.config/google-chrome/cloud9
4.3 Configuring a cloud9 browser profile in Opera
Unfortunately, Cloud9 doesn't seem to work well with Opera.
5. Customizing cloud9 profile
5.1 Theme
Bloomind FT DeepDark 2 theme for Firefox integrates wonderfully with Cloud9 IDE:

For Chrome, I suggest Tiësto theme.

5.2 Customizing the interface
You might want to hide some toolbars and icons in Firefox. Right-click on a toolbar, select Customize, then drag everything you don't need to the customization dialog and everything you need from the various toolbars and from the customization dialog, to the Tabs bar and click Done. Then right-click on a toolbar and untick Add-ons Bar, Navigation Toolbar, Bookmarks Toolbar and Menu Bar. Tick Tabs on Top.
For example, this is how my cloud9 profile toolbar looks like:

5.3 Hide the window border
To hide the window border we can use the window rules feature of the window manager.
5.3.1 Gnome Unity
Unity maximizes applications by default and Firefox has global menu integration, so there is no title bar.
5.3.2 KDE Kwin
Right-click on the cloud9 profile window border, then select Advanced >> Special Window Settings..., then click Window Extra tab. In the Window title option paste:
On Firefox: Cloud9 - Your code, anywhere anytime. - Mozilla Firefox
On Chrome: Cloud9 - Your code, anywhere anytime. - Google Chrome
Select Exact Match option. In the Geometry tab, tick Maximized horizontally and Maximized vertically, select Remember for both and tick the checkboxes. In the Preferences tab, tick No border, set to force and tick the checkbox. Click OK.
6. Chromeless (experimental)
Mozilla has killed Prism, which allowed to run web pages as standalone apps. However, Mozilla Labs folks are now working on the Chromeless project, which can provide a somewhat similar experience.
Webian Shell, which is based on Chromeless, can easily provide such experience. To install Webian Shell, simply download it, extract it to the ~/local folder or somewhere else and execute the binary inside the extracted folder.
Here is what Cloud9 looks like in Webian Shell:

Enjoy!


 Adv Reply

Bookmarks