Page 1 of 2 12 LastLast
Results 1 to 10 of 14

Thread: HowTO: Encrypted LVM Installation on a Netbook

  1. #1
    Join Date
    Jan 2008
    Beans
    4,757

    HowTO: Encrypted LVM Installation on a Netbook

    Part One


    HowTO: Encrypted LVM Installation on a Netbook


    I'll start this guide off with a warning.

    ENCRYPTED FILESYSTEMS CAN BE A FORMIDABLE AND UNFORGIVING SETUP.
    IF THE SYSTEM GOES INTO AN UNBOOTABLE STATE, RECOVER WHAT YOU CAN WITH THE LUKS PASSWORD ON A LIVECD/LIVEUSB.
    YOUR ONLY OPTION IS TO REINSTALL THE OPERATING SYSTEM, LOOSING ALL DATA IN THE PROCESS.
    IF YOU FORGET YOUR PASSWORD, THERE IS NOTHING THAT CAN BE DONE TO RECOVER ANY DATA.

    And as such, I am not liable for any loss of data, as the smart user always makes backups.


    Introduction

    This is part one of a two part guide.

    Inspiration for this guide comes from the popularity of netbooks and other small, portable devices.
    As great as they are, the security implications are at a higher risk as our fallibility and tendencies to loose such devices - and the sensitive data on them - becomes a greater threat.

    With normal Laptops that come supplied with a CD Drive, the Ubuntu Text-based installation offers the feature to encrypt your hard drive. But due to size restrictions, there is no CD Drive, and putting it on a USB pendrive will produce a Alternate CD Install Error: "Cannot find CD" during the initial parts of installation, so in this guide, I use the netboot installation image instead.


    Prerequisites

    In this guide, you will require the following:
    1. Computer Device capable of booting from USB devices
    2. 32MB or greater USB storage device.
    3. Ethernet cable.
    4. A netboot installer image.
    5. uNetBootin to be installed on your current OS.


    Installation

    Without going into vast detail, load the netboot image onto the USB pendrive using uNetBootin, and reboot.
    I won't dictate how you will setup your installation configuration, so anything outside of what is noted below is left to your own discretion.

    What I will note though is that with the netboot installation, you will need to be hooked up to the internet via an ethernet cable throughout the entire installation.

    The images are there for a point of reference, to help aid the familiarity of the procedure if you have never done this before.


    Check disk/Randomise Blocks

    The first step is optional, it is not really required, but can be recommended. Since the disk may go through some stress during the installation period.

    When you reach the "Partition Disk" stage (see first screenshot below), switch to a console by pressing Alt+F2

    Press Enter to activate the console and type in the following.
    Code:
    /sbin/badblocks -c 10240 -s -w -t random -v /dev/sda
    This will check the entire hard drive, with the effect of filling it with random bits of data. On a 160GB hard drive, this can take up to 4 hours.

    Once complete, you can switch back to the installation by pressing Alt+F1


    Partitioning Disks

    How you go about doing this is up to you. Generic installation setups will generally follow the image guide I've laid out below.

    When asked about which partitioning method you want:
    • Select "Guided - use entire disk and set up with Encrypted LVM".
    • Select the disk you want to perform the action on.
    • Select "Yes" to confirm that you want to save changes to disk.
      This will create an encrypted partition with an LVM inside with two partitions for you. The LVM partitions at this point are not formatted.


    Enter in the passphrase that will be used to decrypt the encrypted filesystem twice.


    And lastly, again, what you do here is optional depending on what you want, but the majority of users can just type in max when asked for the amount of the volume group you want to user for partitioning the LVM.


    Blanking the LVM filesystems

    Next, you will come to a page asking you to confirm the filesystems layout that you want to use in the LVM.
    On Jaunty, by default, the root filesystem is ext3, which through experience is something I don't really recommend on Netbooks. Through testing, ext2 or ext4 are noticeably faster.

    So, I advise to work through the following:
    • Select "No" and you will be taken to an advanced partition layout screen.
    • Scroll up near the top and you will see the root filesystem, highlight the line and press Enter.
    • Select "Use As" in the partition menu, and select an alternate filesystem to use.
      I use Ext4, others may want Ext2, or ReiserFS.
    • Select "Done setting up this partition" to leave the menu.
    • Then select "Finishing partitioning and write changes to disk".
      Then you will be back to the original screen.

    Don't proceed with the installation just yet, as there is one more thing to do.


    Once you've done setting up the partitions, press Alt+F2 to switch to a console and press Enter to activate it if you haven't done so already.

    Type in the following, and a list of mounted volume groups will be shown.
    Code:
    ls /dev/mapper/
    To identify which is the root partition, it should have a -root suffix. The prefix being the hostname you chose to give the OS.

    After finding it, run the following:
    Code:
    dd if=/dev/zero of=/dev/mapper/netbook-root
    where netbook-root is the location of the root filesystem.

    Doing this should be a more efficient use of cryptographic primitives, as now you're using dm-crypt as it was designed, instead of using SHA-1 as a PRNG. a third party user has verified that these zero-filled sectors will not be identical, which suggests that this is suitably secure. And if it isn't secure by some chance, then dm-crypt itself has a serious weakness, as filesystems tend to have repeated blocks of data on them from time to time.

    As a worse case scenario, if stolen, whoever has your Netbook/Laptop may be able to tell how much of the filesystem is used, and have a known plaintext (all zeroes) for a cryptanalytic attack. But I'm not expecting them to be that smart in the first place.


    With that job finished, you can switch back to the installation by pressing Alt+F1 and select "Yes" to confirm the partitioning of the LVM.


    Encrypted Home Directory

    When asked if you want to encrypt your Home Directory, I selected yes, for Onion Layers sake. As if someone did manage to decrypt/analyse my hard disk, then they should hopefully have a harder time attempting to decrypt/analyse my personal data.

    NOTE: A colleague advised having an encrypted home folder ontop may be a bit overkill, and may result in losses of read/write access speed.


    Software Setup

    Lastly, you are given the option to select what software you want to install.

    I recommend Xubuntu, as it is light. But everyone will have their own preference, and if in doubt, Ubuntu has an option for you to manually select packages via aptitude.

    Last edited by ibuclaw; May 7th, 2010 at 12:25 AM.

  2. #2
    Join Date
    Jan 2008
    Beans
    4,757

    Re: HowTO: Encrypted LVM Installation on a Netbook

    Reboot into your New System

    Skipping other parts of the installation, that should leave you all setup to reboot and boot into your new encrypted system.

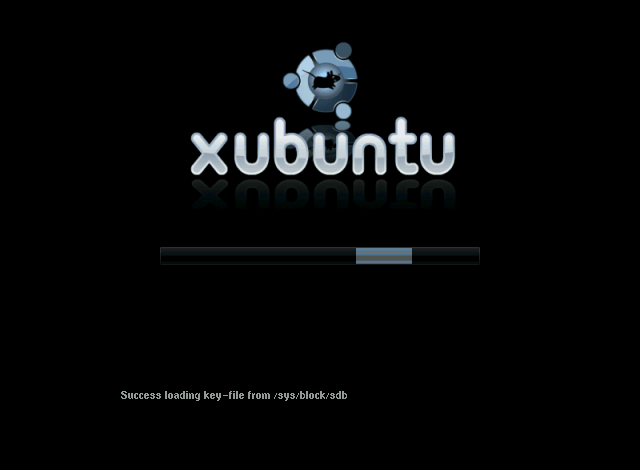
    Enjoy your nice new password prompt at Usplash.


    Part Two


    HowTO: Setup Keyfile for Disk Encryption at Boot

    Introduction

    This is the second part of the two part guide.

    The inspiration for this guide mostly comes from an article I read in the Guardian, a British daily newspaper.
    The internet version of that article can be read here: http://www.guardian.co.uk/technology...ction-internet
    This provoked thoughts and ideas about how I will implement my contingency plan.

    What I came up with was to use an existing feature of dm-crypt - a Keyfile - and that keyfile now lives on an SD card to which my family is in possession of.
    This guide documents my steps to implementing this.


    Create Keyfile

    There are numerous ways to produce a keyfile, you can look them up and compare, but I prefer this method:
    Code:
    head -c 4096 /dev/urandom  > .netbook.key
    Then to add the keyfile to the Luks partition keyring, run:
    Code:
    sudo cryptsetup luksAddKey /dev/sda1 .netbook.key
    Once that is all done, move the keyfile to a USB drive or SD Card.

    For example:
    Code:
    mv .netbook.key /media/disk/.netbook.key
    Create a Safeboot

    Before making any dia changes that may leave your system in an unbootable state. Make a backup of your initrd.img
    To find out what the initrd you use:
    Code:
    ls /boot/initrd.img*
    If you run Ubuntu Jaunty, at this time of writing, you will get initrd.img-2.6.28-15-generic as the output from that.

    Now, whatever the name, make a copy of it:
    Code:
    sudo cp -a /boot/initrd.img-2.6.28-15-generic /boot/initrd.img-2.6.28-15-generic-safe
    And add a new boot stanza menu.lst file if you use Grub as your bootloader.
    Code:
    gksudo gedit /boot/grub/menu.lst
    and copy your main boot stanza to the bottom, and make the following changes you can see below.
    Once complete, save and quit.
    Code:
    ## ## End Default Options ##
    
    title		Ubuntu 9.04, kernel 2.6.28-15-generic
    uuid		b7c89e2d-ac2d-4d74-81cf-64c7483d4aa0
    kernel		/vmlinuz-2.6.28-15-generic root=/dev/mapper/netbook-root ro quiet splash quiet 
    initrd		/initrd.img-2.6.28-15-generic
    quiet
    
    title		Ubuntu 9.04, kernel 2.6.28-15-generic (recovery mode)
    uuid		b7c89e2d-ac2d-4d74-81cf-64c7483d4aa0
    kernel		/vmlinuz-2.6.28-15-generic root=/dev/mapper/netbook-root ro single
    initrd		/initrd.img-2.6.28-15-generic
    
    title		Ubuntu 9.04, memtest86+
    uuid		b7c89e2d-ac2d-4d74-81cf-64c7483d4aa0
    kernel		/memtest86+.bin
    quiet
    
    ### END DEBIAN AUTOMAGIC KERNELS LIST
    title		Ubuntu 9.04, kernel 2.6.28-15-generic (safe boot)
    uuid		b7c89e2d-ac2d-4d74-81cf-64c7483d4aa0
    kernel		/vmlinuz-2.6.28-15-generic root=/dev/mapper/netbook-root ro quiet splash quiet 
    initrd		/initrd.img-2.6.28-15-generic-safe
    quiet
    If you use Grub2 as your bootloader, as is the default with Ubuntu Karmic and later releases, then you will have a slightly different way to implement this. But until it is released, this won't be included in this guide.


    Add Modules to Ramdisk

    OK, with the backup setup, it's now time to edit the bootloader files.
    First, we have the ramdisk to change.
    Code:
    gksudo gedit /etc/initramfs-tools/modules
    And add the following to the bottom of the file
    Code:
    ## Crypt Key Lines
    # USB Devices
    usb_storage
    
    # SD Cards
    ricoh_mmc
    sdhci_pci
    sdhci
    
    # Fat Filesystems
    fat
    vfat
    nls_cp437
    nls_iso8859-1
    nls_utf8
    
    # Ext2 Filesystem modules are built into kernel
    # Uncomment if `grep ext2 /proc/modules` has output
    #ext2
    Save and quit.


    Decrypt Script

    Next, is to create the decrypt script.

    Firstly, it is not perfect, and may require tweaking to get it right, but it should work on all machines generically so long as you keep to the following guideline:
    • The keyfile is on a /dev/sd* or a /dev/mmcbk* drive.
    • The keyfile is on a ext2 or vfat filesystem.
      or The keyfile is on a filesystem to whom's modules are built into the kernel.
    • The keyfile is on the First Primary Partition on the disk (ie: sda1, sdb1, mmcbk1p1)


    I must also note the following too:
    • If present, this script will work with Usplash in the first instance.
    • If present, this script will work with stty in the second instance.
    • Else this script will give you a warning that the password may be visible on screen.

    Ubuntu uses Usplash by default, but different people prefer to have different setups, and so they may have the script work differently for them.

    OK, with that said and understood, open a file:
    Code:
    gedit keyscript.sh
    And paste the following in:
    Code:
    #!/bin/sh
    # Key file in the USB disk
    KEYFILE=.netbook.key
    
    USPLASH=0
    if [ -p /dev/.initramfs/usplash_outfifo -a -x /sbin/usplash_write ]; then
      /sbin/usplash_write "VERBOSE on"
      if [ $? -eq 0 ]; then
          USPLASH=1
          /sbin/usplash_write "CLEAR"
      fi
    fi
    
    STTY=0
    STTYCMD=false
    if [ -x /bin/stty ]; then
        STTY=1
        STTYCMD=/bin/stty
    elif [ `(busybox stty >/dev/null 2>&1; echo $?)` -eq 0 ]; then
        STTY=1
        STTYCMD="busybox stty"
    fi
    
    msg ()
    {
       if [ $# -gt 0 ]; then
           echo $2 | while read LINE; do
           if [ $USPLASH -eq 1 ]; then
               /sbin/usplash_write "$1 $LINE"
           else
               echo $3 "$2" >&2
           fi
           done
       fi
    }
    
    readpass ()
    {
       if [ $# -gt 0 ]; then
           if [ $USPLASH -eq 1 ]; then
               usplash_write "INPUTQUIET $1: "
               PASS="$(cat /dev/.initramfs/usplash_outfifo)"
           else
               [ $STTY -ne 1 ] && msg TEXT "WARNING stty not found, password will be visible"
               echo -n "$1" >&2
               $STTYCMD -echo
               read -r PASS </dev/console >/dev/null
               [ $STTY -eq 1 ] && echo >&2
               $STTYCMD echo
           fi
       fi
       if [ -z "$PASS" ]; then
           exec "$0" "$2"
       fi
       echo -n "$PASS"
    }
    
    MD=/tmp-usb-mount
    
    if [ "x$1" = "x" -o "x$1" = "xnone" ]; then
        KEYF=$KEYFILE
    else
        KEYF=$1
    fi
    
    USBLOAD=0
    MMCLOAD=0
    cat /proc/modules | busybox grep usb_storage >/dev/null 2>&1
    USBLOAD=$?
    cat /proc/modules | busybox grep mmc >/dev/null 2>&1
    MMCLOAD=$?
    
    if [ $USBLOAD -gt 0 -o $MMCLOAD -gt 0 ]; then
        modprobe usb_storage >/dev/null 2>&1
        modprobe ricoh_mmc >/dev/null 2>&1
        modprobe mmc_block >/dev/null 2>&1
        modprobe sdhci_pci >/dev/null 2>&1
        modprobe sdhci >/dev/null 2>&1
    fi
    sleep 7
    OPENED=0
    
    ls -d /sys/block/sd* >/dev/null 2>&1
    SDS=$?
    
    if [ $SDS -eq 0 ]; then
        echo "Trying to get the key from USB keychain ..." >&2
        mkdir -p $MD
    
        for SFS in /sys/block/sd*; do
            DEV=`busybox basename $SFS`
            F=$SFS/${DEV}1/dev
            if [ 0`cat $SFS/removable` -eq 1 -a -f $F ]; then
                echo "> Trying device: $DEV ..." >&2
                FSTYPE=`cat /dev/.udev/db/*${DEV}1 | busybox sed -n 's/.*ID_FS_TYPE=\(.*\)/\1/p'`
                echo "> Filesystem type $FSTYPE ..." >&2
                cat /proc/modules | busybox grep $FSTYPE >/dev/null 2>&1
                FSLOAD=0$?
                if [ $FSLOAD -gt 0 ]; then
                    modprobe $FSTYPE >/dev/null 2>&1
                fi
                mount /dev/${DEV}1 $MD -t $FSTYPE -o ro 2>/dev/null
                if [ -f $MD/$KEYF ]; then
                    cat $MD/$KEYF
                    umount $MD 2>/dev/null
                    OPENED=1
                    break
                fi
                umount $MD 2>/dev/null
            fi
        done
    fi
    
    ls -d /sys/block/mmcblk* >/dev/null 2>&1
    MMCS=$?
    
    if [ $MMCS -eq 0 -a $OPENED -eq 0 ]; then
        echo "Trying to get the key from MMC keychain ..." >&2
        mkdir -p $MD
    
        for SFS in /sys/block/mmcblk*; do
            DEV=`busybox basename $SFS`
            F=$SFS/${DEV}p1/dev
            if [ 0`cat $SFS/removable` -eq 1 -a -f $F ]; then
                echo "> Trying device: $DEV ..." >&2
                FSTYPE=`cat /dev/.udev/db/*${DEV}p1 | busybox sed -n 's/.*ID_FS_TYPE=\(.*\)/\1/p'`
                echo "> Filesystem type $FSTYPE ..." >&2
                cat /proc/modules | busybox grep $FSTYPE >/dev/null 2>&1
                FSLOAD=0$?
                if [ $FSLOAD -gt 0 ]; then
                    modprobe $FSTYPE >/dev/null 2>&1
                fi
                mount /dev/${DEV}p1 $MD -t $FSTYPE -o ro 2>/dev/null
                if [ -f $MD/$KEYF ]; then
                    cat $MD/$KEYF
                    umount $MD 2>/dev/null
                    OPENED=1
                    break
                fi
                umount $MD 2>/dev/null
            fi
        done
    fi
    
    [ $USPLASH -eq 1 ] && msg STATUS "                               " && msg CLEAR ""
    
    if [ $OPENED -ne 1 ]; then
    # If you wish to change the error message, change it here:
        msg TEXT "FAILED to find suitable USB key-file ..."
        msg TEXT "If this is your first attempt, try removing and reinserting the key device,"
        msg TEXT "wait five seconds for all devices to settle, then press Enter."
        msg TEXT "Else, enter the LUKS password to decrypt the disk."
        readpass "Password" "$1"
    else
        msg TEXT "Success loading key-file from $SFS"
    fi
    
    [ $USPLASH -eq 1 ] && /sbin/usplash_write "VERBOSE default"
    Save the file and install it into your system:
    Code:
    sudo install keyscript.sh /usr/local/sbin/keyscript.sh

    Alter Crypttab

    Lastly, we need to change the crypttab file to include the keyscript in the decrypt process.
    Code:
    gksudo gedit /etc/crypttab
    You should not copy and paste any of the code text outlined here.

    If you look carefully at your own crypttab file, you should see something like this:
    Code:
    sda1_crypt /dev/disk/by-uuid/b7c89e2d-ac2d-4d74-81cf-64c7483d4aa0 none luks
    First, what you do, is make a copy of that line:
    Code:
    sda1_crypt /dev/disk/by-uuid/b7c89e2d-ac2d-4d74-81cf-64c7483d4aa0 none luks
    sda1_crypt /dev/disk/by-uuid/b7c89e2d-ac2d-4d74-81cf-64c7483d4aa0 none luks
    Then comment out the first line and alter the second.

    To comment on the bits in red.
    .netbook.key is the name of the keyfile, as found on the external storage device.

    ie: if your external device is /dev/sdb1, mounted on /media/disk, and the keyfile is located /media/disk/.keyfile/mykey
    Then you would have the following:
    Code:
    sda1_crypt /dev/disk/by-uuid/b7c89e2d-ac2d-4d74-81cf-64c7483d4aa0 .keyfile/mykey luks,keyscript=/usr/local/sbin/keyscript.sh
    keyscript=/usr/local/sbin/keyscript.sh is the location of the script file, you should have installed it in the location above - if you installed it elsewhere, specify.

    The ending result should look like the following changes as you can see outlined here:
    Code:
    #sda1_crypt /dev/disk/by-uuid/b7c89e2d-ac2d-4d74-81cf-64c7483d4aa0 none luks
    sda1_crypt /dev/disk/by-uuid/b7c89e2d-ac2d-4d74-81cf-64c7483d4aa0 .netbook.key luks,keyscript=/usr/local/sbin/keyscript.sh
    If you are happy that everything looks fine, save and quit.


    Update Ramdisk and Reboot

    And that is hopefully it!
    Just update the ramdisk:
    Code:
    sudo update-initramfs -u all
    and then reboot your system.

    If the script fails to detect the device that your keyfile is on/you don't plug in the device at boot, this is the message that you get.


    If all is a success, then you will receive this message, and Ubuntu will continue to boot as normal.


    Testimonials and Improvements

    If you have any testimonies, queries or improvement suggestion. Please shout and I will be happy to help.

    Regards
    Iain
    Last edited by ibuclaw; May 6th, 2010 at 11:58 PM.

  3. #3
    Join Date
    Dec 2007
    Location
    Philippines
    Beans
    Hidden!
    Distro
    Ubuntu UNR

    Re: HowTO: Encrypted LVM Installation on a Netbook

    Thanks for this! will try this on my netbook as soon as it comes home
    Contribute your unused processing power! Help fight Disease!
    Asus1000HG, Intel(R) Atom(TM) CPU N270 @ 1.60GHz, 2GB Memory, 160GB Storage
    Ubuntu Netbook Edition 10.04

  4. #4
    Join Date
    Jan 2008
    Beans
    4,757

    Re: HowTO: Encrypted LVM Installation on a Netbook

    OK, all is finished now.

    Any advice on improvement would be appreciated.

    Regards
    Iain

  5. #5
    Join Date
    Aug 2007
    Beans
    8
    Distro
    Ubuntu 9.04 Jaunty Jackalope

    Re: HowTO: Encrypted LVM Installation on a Netbook

    Good tutorial, I am definitely able to follow along with this and is very interesting.

    One question though, I have a current full disk encrypted install of Ubuntu 9.04 on a standard laptop. Would your method of 'HowTo setup Keyfile for boot' work? What I want to do is make it so that instead of asking for the password on the computer, it'll look for that keyfile on USB and then boot-up. What I DON'T want, is to try this and then not be able to access my computer anymore!

    Any advice on if using your method would be feasible for an already existing setup, is appreciated.

  6. #6
    Join Date
    Jan 2008
    Beans
    4,757

    Re: HowTO: Encrypted LVM Installation on a Netbook

    Quote Originally Posted by PenquinCoder View Post
    Good tutorial, I am definitely able to follow along with this and is very interesting.

    One question though, I have a current full disk encrypted install of Ubuntu 9.04 on a standard laptop. Would your method of 'HowTo setup Keyfile for boot' work? What I want to do is make it so that instead of asking for the password on the computer, it'll look for that keyfile on USB and then boot-up. What I DON'T want, is to try this and then not be able to access my computer anymore!

    Any advice on if using your method would be feasible for an already existing setup, is appreciated.
    You have excellent timing in posting your replies.

    Yes, it will work on a standard laptop too, just make sure that you backup your initrd.img and create a safe-boot boot stanza in your grub's menu.lst file, and you are all OK incase things go wrong.

    edit:
    If you are truly uncomfortable with anything, try it in a VM.
    All the screenshots you see were done in VirtualBox3.0 with USB support enabled.

    Regards
    Iain
    Last edited by ibuclaw; September 14th, 2009 at 10:15 PM.

  7. #7
    Join Date
    Apr 2007
    Beans
    5
    Distro
    Ubuntu 10.04 Lucid Lynx

    Re: HowTO: Encrypted LVM Installation on a Netbook

    If, when trying to setup the keyfile authentification, you get this error:
    Code:
    unable to load nls charset utf8
    You should add "nls_utf8" to the list of modules to load, like that:
    Code:
    # Fat Filesystems
    fat
    vfat
    nls_cp437
    nls_iso8859-1
    nls_utf8
    Also, I literally spent hours on /etc/crypttab ... You should not copy/paste the instructions given here, but rather copy them manually.

  8. #8
    Join Date
    Jan 2008
    Beans
    4,757

    Re: HowTO: Encrypted LVM Installation on a Netbook

    Quote Originally Posted by Edzilla View Post
    If, when trying to setup the keyfile authentification, you get this error:
    Code:
    unable to load nls charset utf8
    You should add "nls_utf8" to the list of modules to load, like that:
    Code:
    # Fat Filesystems
    fat
    vfat
    nls_cp437
    nls_iso8859-1
    nls_utf8
    Also, I literally spent hours on /etc/crypttab ... You should not copy/paste the instructions given here, but rather copy them manually.
    Thanks, I've updated the post to include that.

    Yes, this guide was never really meant for copying and pasting, but once you know how to do it, you will get very comfortable setting it up.

    Is there anything else I could do to help or update the post? (ie: comments in the code samples to explain what it is doing)

    Regards
    Iain

  9. #9
    Join Date
    Apr 2007
    Beans
    5
    Distro
    Ubuntu 10.04 Lucid Lynx

    Re: HowTO: Encrypted LVM Installation on a Netbook

    Quote Originally Posted by tinivole View Post
    Thanks, I've updated the post to include that.

    Yes, this guide was never really meant for copying and pasting, but once you know how to do it, you will get very comfortable setting it up.

    Is there anything else I could do to help or update the post? (ie: comments in the code samples to explain what it is doing)

    Regards
    Iain
    What I meant is that pasting something didn't work and typing the exact same thing worked.
    At some point I commented a working version of crypttab, then uncommented it, and it didn't work anymore.
    adding "#" and then removing it broke the whole thing.

  10. #10
    Join Date
    Jan 2008
    Beans
    4,757

    Re: HowTO: Encrypted LVM Installation on a Netbook

    Quote Originally Posted by tinivole View Post
    Code:
    #sda1_crypt /dev/disk/by-uuid/b7c89e2d-ac2d-4d74-81cf-64c7483d4aa0 none luks
    sda1_crypt /dev/disk/by-uuid/b7c89e2d-ac2d-4d74-81cf-64c7483d4aa0 .netbook.key luks,keyscript=/usr/local/sbin/keyscript.sh
    This is not something that you should copy and paste.

    If you look at it, what you do is make a copy of your own crypttab file, so you have something that looks like this:
    Code:
    sda1_crypt /dev/disk/by-uuid/b7c89e2d-ac2d-4d74-81cf-64c7483d4aa0 none luks
    sda1_crypt /dev/disk/by-uuid/b7c89e2d-ac2d-4d74-81cf-64c7483d4aa0 none luks
    Comment out the first line, then alter the second.

    To comment on the bits in red.
    .netbook.key is the name of the keyfile, as found on the external storage device.

    ie: if your external device is /dev/sdb1, mounted on /media/disk, and the keyfile is located /media/disk/.keyfile/mykey
    Then you would have the following:
    Code:
    sda1_crypt /dev/disk/by-uuid/b7c89e2d-ac2d-4d74-81cf-64c7483d4aa0 .keyfile/mykey luks
    ,keyscript=/usr/local/sbin/keyscript.sh is the location of the script file, you should have installed it in the location above.

    Regards
    Iain

Page 1 of 2 12 LastLast

Bookmarks

Posting Permissions

  • You may not post new threads
  • You may not post replies
  • You may not post attachments
  • You may not edit your posts
  •